
We've been doing these basic dart manipulations in my flat pattern class for the past few weeks, on paper. And if it isn't obvious from this blog's name, I'm a big fan of starting out on paper, whether it's a paper prototype for your interface design, or learning about textile weaves.
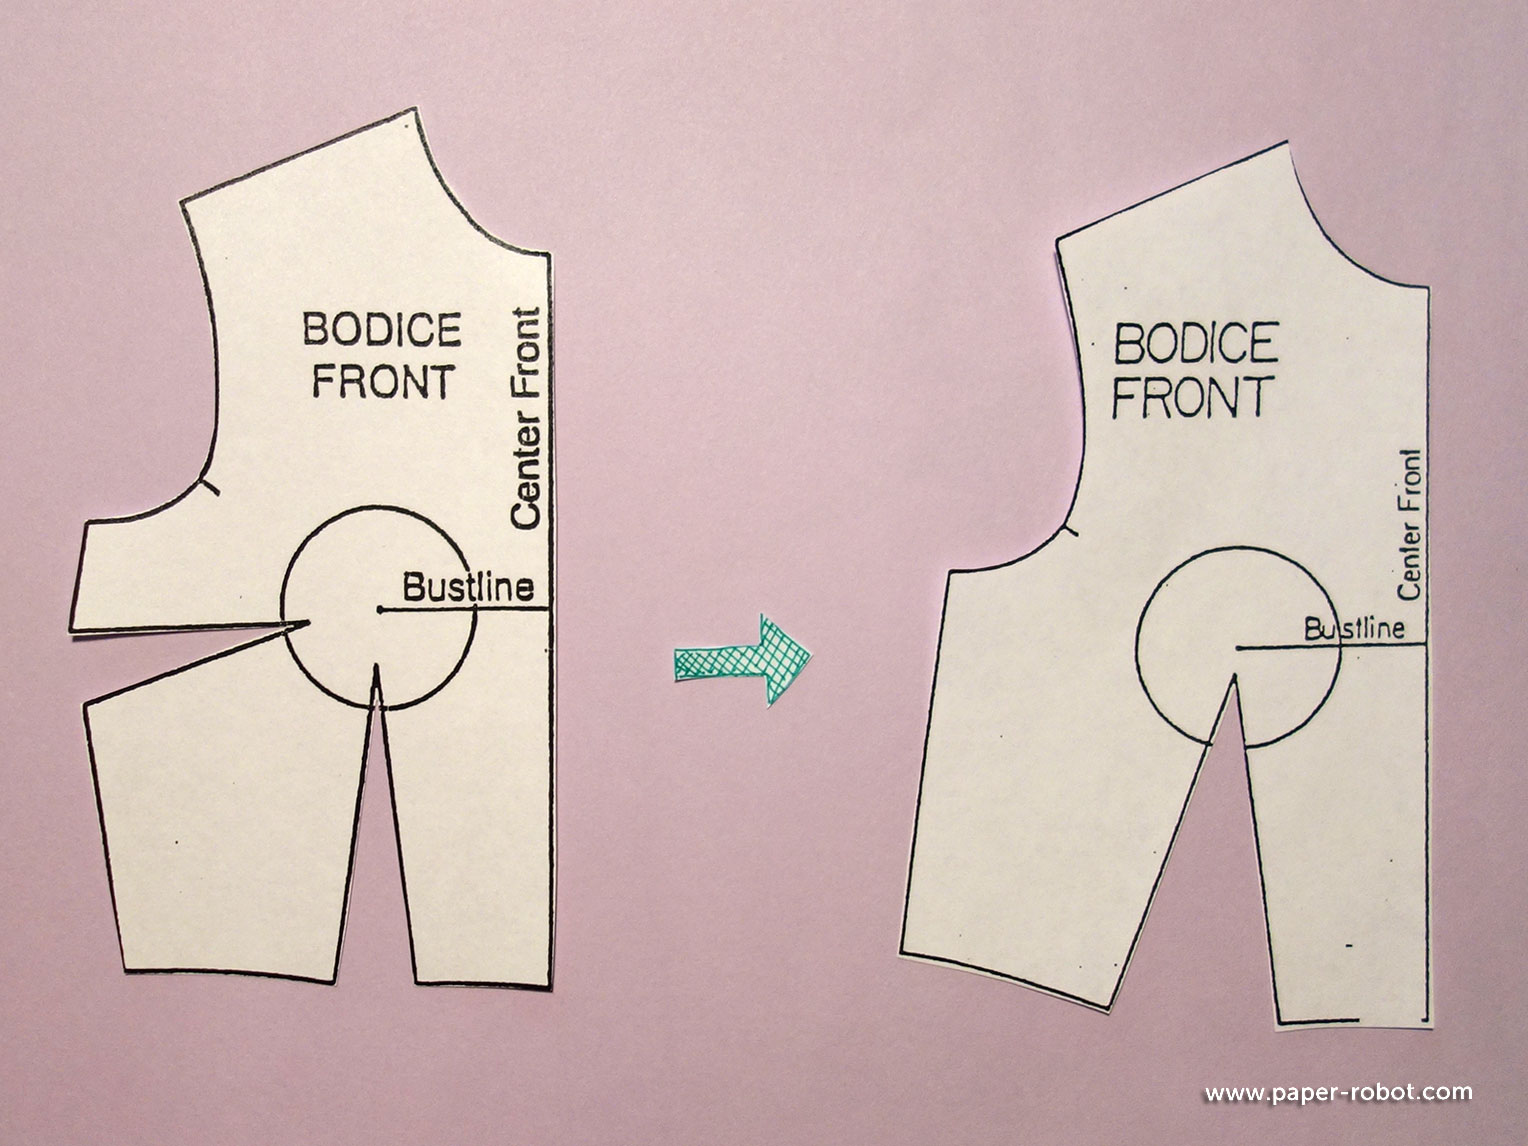
The dart manipulation above is the one I'm about to show you in this post, where we add the side seam dart into the waist seam dart, to create one bigger, combined dart.
Creating a combined dart
I'm using these small paper bodice slopers, but you can do this on any flat pattern (e.g., from companies like Simpicity or McCall's) that fits you. If you do this on another pattern, however, I highly recommed tracing it with pattern paper first. That way you still have the original for making other modifications, too!

1. Mark the original pattern.
First, mark the dart to be closed. To do this, place a ruler along the centre of the dart, connecting to the bust apex (where the nipple should sit). Sometimes this is marked on commercial patterns.
Next, mark from the centre of the waistline dart, to the same point. You should end up with two lines like so:

2. Cut
Cut along each of these lines to the apex, leaving a small sliver of paper at that point.

3. Close the old dart
Using that small sliver of paper as your rotation point, close the old dart at the side seam, thus widening the waistline one.

This is the magical part!
The paper will overlap a bit at the centre, but you want the sides of the old dart to sit just flush against one another at the side seam. Then, tape it down.
4. True the side seam
This particular dart manipulation will create a bit of a jog at the side seam, where the dart used to be. This happens often when you close darts. We know this used to be straight, though, so go ahead and make that line straight again. This is called truing the seam.

5. Tape to tissue paper
Take a cut of tissue paper and tape it underneath the new, wider dart. This is what we'll use to mark our new dart.

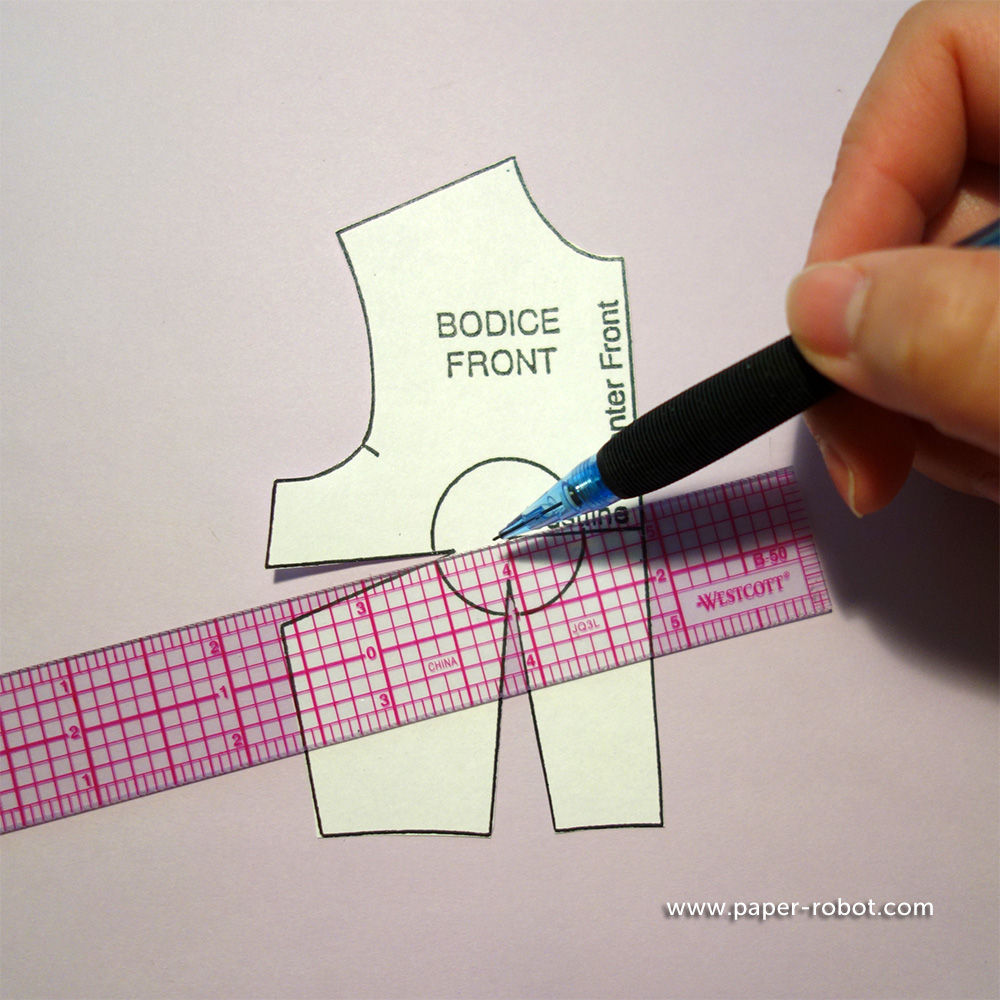
Mark along the new dart centre, 1/2" from the bust apex (this is a quarter scale, so I should be marking 1/8" from the apex), since this is a combined dart.

6. Draw the new dart
From that point, draw lines to the corners of the dart. This creates the actual dart that you would sew.

It's a little hard to see, since this paper is so small, but there is a bit of a pencil line that deviates from the legs of the paper.
7. Fold & Trim
Next, fold the tissue paper along the dart legs, as if you had already sewn the dart and were ironing it down. Since this is a vertical dart, we want the fold of the dart to head towards the centre front.
To do this, first fold the leg that is closest to the centre front, and bring it over to meet the other side of the dart.

Trim along the waistline. It's possible that some truing will be needed here, to maintain the smooth curve at the waist.
8. New dart!
And voila, you have a new dart!

So far, this accounts for all the excess fabric you would need, but you might have noticed that there are no seam allowances on my sample.
9. Add seam allowances
In class, we mount these to a piece of contrasting coloured paper, and add seam allowances (1/2" for all seams, but 1/4" at the collar). We can also add markings and cutting instructions, as well as a little diagram for what this is trying to achieve.

Do as I say and not as I do, however; this bodice front has a centre fold, so I shouldn't have added a seam allowance there. Oops! Time to go off and fix that!
Your blogs are easily accessible and quite enlightening so keep doing the amazing work guys. Homepage
ReplyDeleteFor many people this is the best solution here see how to do it. flower shop in Pune
ReplyDelete