Our classrooms at school have got the best damn ironing boards I have ever used, hands down. I hate normal ironing boards. I always manage to get my fingers caught in some lever, and nothing ever really gets flattened properly. But these boards are The. Best. And with no sewing required, they're easy to make, too!
Supplies:
- A piece of plywood (Mine is ~24"x24", but any size you want is fine)
- 100% cotton fabric (a print you bought but are too embarrassed to wear in public)
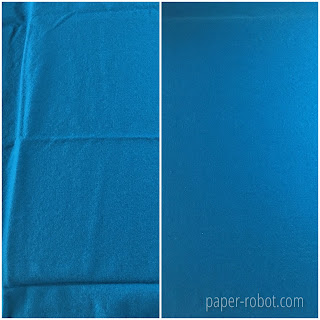
- 100% wool fabric, medium weight
- Staple gun & stainless steel staples
- Scissors
It's very important to be sure that your wool fabric is 100% wool, and not a blend! Wool provides padding for your board, and its wickability absorbs steam as you iron. The natural chemical composition of wool also makes it flame retardant.
1. Prep your pieces
Fabric: If your fabric is wrinkly, you can iron it out on top of your board, before you even start. Seriously, that's what I did!
Board: You can sand down your board if it's got a lot of splintery pieces, but I just left mine, and let the wool pad it a bit.
2. Cut fabric to size
Lay your cotton down on a stable surface, with the print side down. Place the wool on top, and then the board, making sure to leave at least 2" on each side.
Trim your fabric, overlapping so there is a little more cotton along each edge, like so:
3. Staple along edges
In the middle of one edge, pull both layers of fabric over the board, folding the cotton over slightly before stapling. Try not to fold the wool over, because too many layers of wool are hard to staple through. This is why we cut the cotton longer.
Do this for each edge of your board, tugging slightly to ensure a snug fit.
4. Cut corners
The corners are a little tricker. Simply folding over will create too much bulk for most staple guns to go through, and can threaten the stability of your resulting board. To avoid this, cut a square out of the corner.
Leave enough beyond the edge of the board, so you can tuck it in a bit:
Staple that down, then finish the corner, folding edges over like before.
If you're going to run into problems, it will be here.
5. Troubleshooting corners
Problem #1: "Oops, I cut too much off of the corner!"
Cutting off too much makes it impossible to tuck the flap in, resulting in a small gap. Just hand stitch that sucker closed.
Problem #2: "Oops, I left too much on!"
Too many layers of wool, folded over, can be too thick for the staple gun. Trim the fabric, and do the best you can while stapling as much as possible. Seriously. Nobody is going to see this corner. You can hand stitch here, too, to keep it down, while stapling in less bulky areas.
Sorry I stapled right through your face, Rarity, but it was thinner there than along the edge.
6. Flip it over!
If you've done everything right, and trust me, you probably have, then flip your board over, and you've got a fantastic new ironing board!
This entire process took me less than an hour, and it's come in handy so many times already. I hope you can make one, too!


?m impressed, I must say. Really rarely do I encounter a blog that?s both educative and entertaining, and let me tell you, you have hit the nail on the head. Your idea is outstanding; the issue is something that not enough people are speaking intelligently about. I am very happy that I stumbled across this in my search for something relating to this. You can get amazing stuff of Heat resistant fabric by Daletec.com from here
ReplyDeleteIroning clothes is a tedious but necessary household chore. best ironing board
ReplyDelete