
I'm pretty sure those are the actual lyrics of the song. No? OK they aren't. But hems are great, not just for garments, but for just about anything that isn't being turned out.

You probably know how to do a basic hem, but in case you want to see pictures and don't want to use bias binding, here's how you can add one so your edges don't unravel.
I wish I could say I took these photographs ages ago, back when I made my Sherlock Holmes skirt, but the truth is, this skirt has been sitting around, unfinished, for months. It even has pockets! There really is no excuse.
To do a basic hem, you' really only need two supplies:
To make a 1" hem, fold 1/2" along the edge of your unfinished edge, pinning the fabric in place. It's best to iron, remove the pins, and then fold up another 1/2", before sewing. For a larger or smaller hem, adjust the fold widths accordingly. Just make sure that there is enough in the first fold to catch when you sew.
If you're using a plain woven fabric, especially cotton, you can avoid using an iron by making a sharp crease with your nail instead of folding. This runs the risk of damaging your fabric, but it does work!
If you want to get into fancier tools, consider using a hem gauge* or the Dritz Ezy-Hem*.
*Amazon affiliate links: I get 4% of any associated purchase when you use them.


Because it's made of metal, you can iron right over the Ezy-Hem, without needing to pin first. However, because it's made of metal, it can get hot, so do be careful.
The hem gauge is a more traditional tool. It has a sliding marker which you can use to maintain a consistent width while you make your folds. You don't have to spend too much to get a functional hem gauge; even the least expensive ones have markers that tend to stay in place.

As you fold your fabric up, iron (or crease!) and pin.
Unpin and repeat to get a double fold:

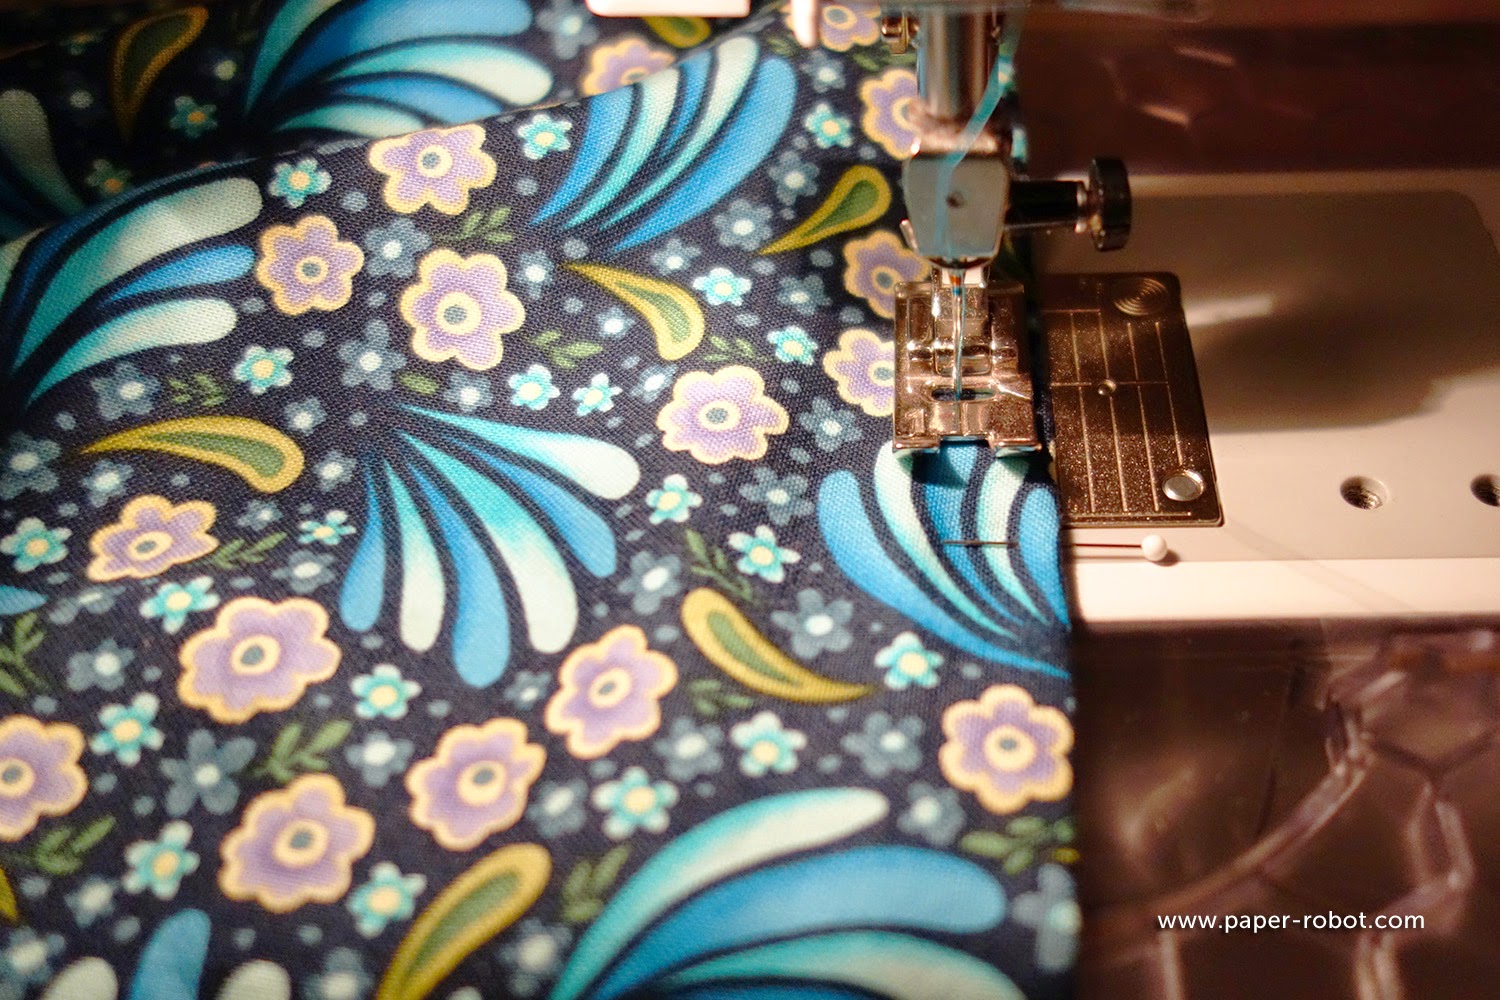
Sew the appropriate distance away from the edge, using the markings on your needle plate:
If you want your hem to look more decorative, bring out that edge stitch foot and stitch beside your first line. This can take longer, but can provide a more sturdy hem.

By folding your hem up twice, the unfinished edge is tucked into the folds, where it won't be agitated and fall apart while wearing or washing. And this leaves you with nice, clean lines at the bottom of your garment!

C'est moi!

- Pins
- A ruler
To make a 1" hem, fold 1/2" along the edge of your unfinished edge, pinning the fabric in place. It's best to iron, remove the pins, and then fold up another 1/2", before sewing. For a larger or smaller hem, adjust the fold widths accordingly. Just make sure that there is enough in the first fold to catch when you sew.
If you're using a plain woven fabric, especially cotton, you can avoid using an iron by making a sharp crease with your nail instead of folding. This runs the risk of damaging your fabric, but it does work!
If you want to get into fancier tools, consider using a hem gauge* or the Dritz Ezy-Hem*.
*Amazon affiliate links: I get 4% of any associated purchase when you use them.
The Ezy-Hem, despite its terrible name, is a very useful hemming tool. Along with other measurements, the Ezy-Hem has standard 1/2" and 5/8" markings along the edges, and a curved side for dem curvy hems.
Because it's made of metal, you can iron right over the Ezy-Hem, without needing to pin first. However, because it's made of metal, it can get hot, so do be careful.
The hem gauge is a more traditional tool. It has a sliding marker which you can use to maintain a consistent width while you make your folds. You don't have to spend too much to get a functional hem gauge; even the least expensive ones have markers that tend to stay in place.
As you fold your fabric up, iron (or crease!) and pin.
Unpin and repeat to get a double fold:
Sew the appropriate distance away from the edge, using the markings on your needle plate:
If you want your hem to look more decorative, bring out that edge stitch foot and stitch beside your first line. This can take longer, but can provide a more sturdy hem.
By folding your hem up twice, the unfinished edge is tucked into the folds, where it won't be agitated and fall apart while wearing or washing. And this leaves you with nice, clean lines at the bottom of your garment!
C'est moi!
No comments:
Post a Comment