

Darts can seem a little complicated to sew, but are actually quite straightforward. In this post, I'll show you how to sew a basic dart in five steps, using photographs I took while making my Sherlock Skirt test run.
1. Transfer Markings
The first thing to do is transfer the dart from the pattern piece onto the wrong side of your fabric. You can use tailor's chalk, or wax-free tracing paper and a tracing wheel.*
*Amazon affiliate links: I get 4% of any associated purchase as credit! :)

To transfer markings using tracing paper, I like to keep the paper folded in half, and the fabric attached to the pattern piece. You can see the triangular dart shape below:
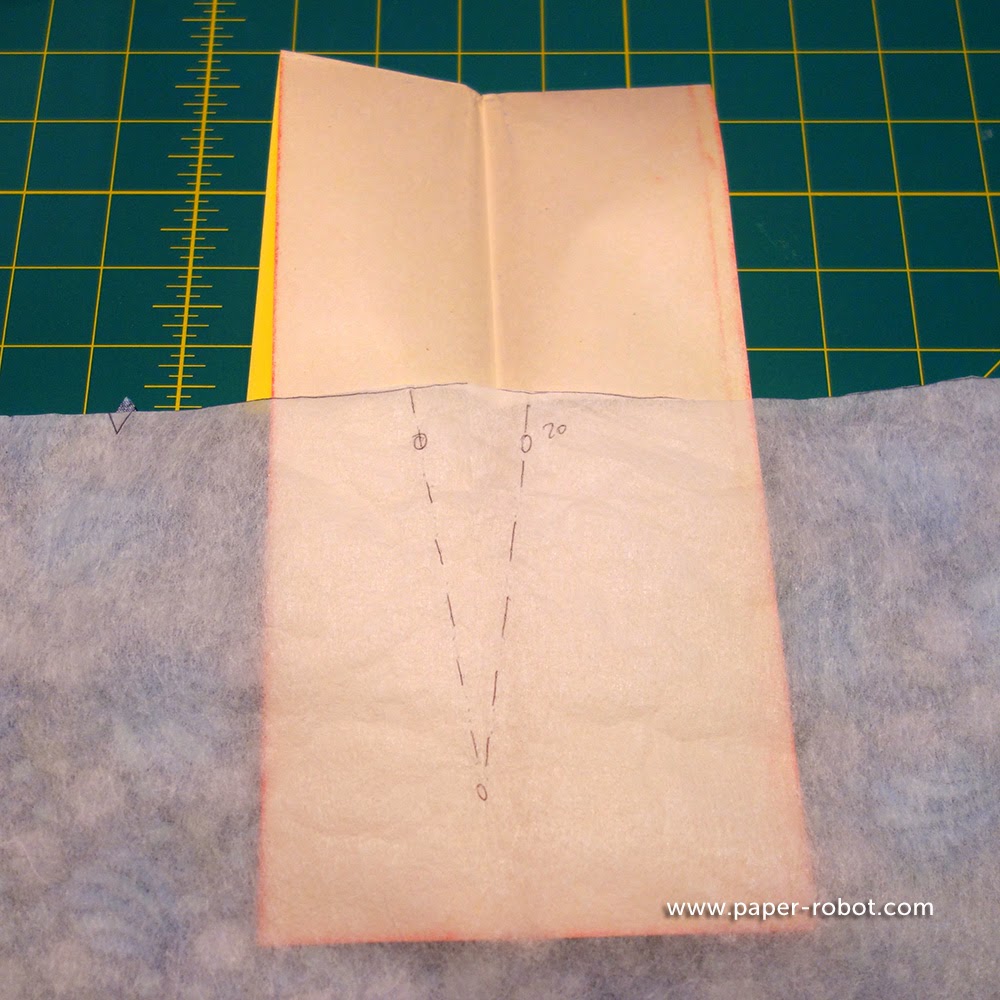
With the coloured sides against the wrong sides of the fabric, gently roll the tracing wheel along the lines, using a ruler to keep the markings straight.
Then, without moving the fabric or the paper, use the head of a pin to mark the three circles at the top and the point. It should look like this:

2. Fold and Pin
Next, fold the fabric in half, with the right sides together.
Use pins to make sure that the dart markings align, matching up the two circles at the top.
Once you're satisfied with the placement, pin along the fold.

3. Sew That Dart!
Now you're ready to sew! Using a standard stitch, start at the top of the fabric, and sew along the marked line to the bottom point of the triangle.
It's very important at this point to backstitch only at the top of the fabric, and not at the bottom point. The extra stitches make the seam too thick, and can prevent the dart from sitting properly.
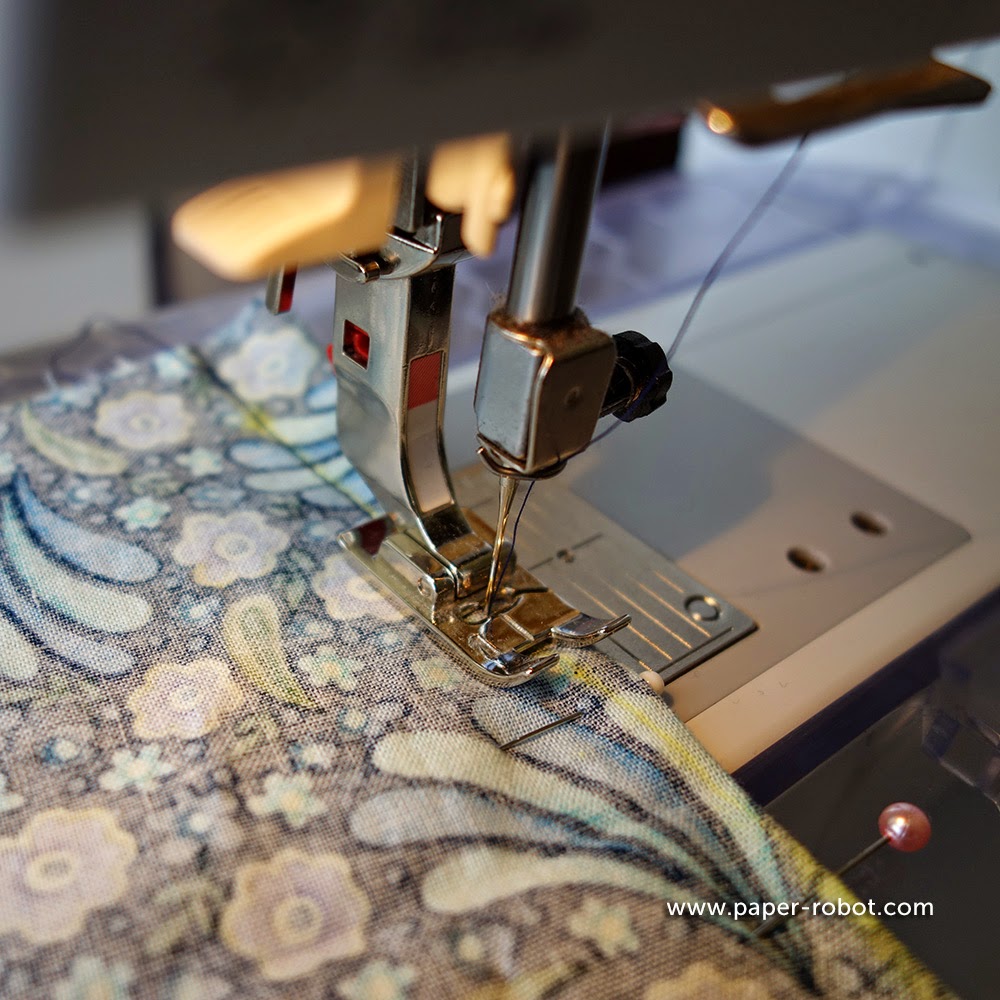
Instead, what I do is sew down to the point, lift the needle and the presser foot, then pull the fabric out to leave a long tail.

4. Secure Threads
There are a couple of ways to secure the tail. The easiest way is to tie an overhand knot onto a pin, and use the pin to wiggle the knot close to the point.

Tie another knot to secure it:

You can use some Fray Block* to secure the knot, but it usually isn't necessary. If you do choose to do so, use a toothpick or a pin to apply the glue. Darts are designed to sit right up against the body, and the last thing you want is a rough patch irritating your skin!
*Also an Amazon affiliate link! :)

As you can see, I use a lot of Fray Block...
5. Iron
I know I usually joke about not ironing my sewing, because I really don't iron my seams as much as I ought to, but I always iron my darts. Ironing your dart opens up the seam properly, and is very important to do early.
If you have a tailor's ham around, you can use one to iron that curve, but if you don't, you can ball up a large piece of scrap fabric in a pinch.

Et voilà! A pretty damn good makeshift ham. This one is accidentally but appropriately pink.

Position the "ham" under the dart you just sewed, with the wrong side of the fabric up. If you're using a delicate fabric, you may want to place another piece of scrap fabric on top, to protect it. In this case, I'm just using basic cotton, so I'm not worried.

Iron the dart down, tugging slightly on the fabric to ensure that the seam is pressed close.
You will want to make sure that the bulk of the dart fabric moves towards the outside of the garment. So, for example, a dart on the back right-hand side of a pair of pants will have the fold pointing to the right of the pants.

In many garment situations, the pattern will get you to stay-stitch the top of the waist before moving on. This is a great way to secure the direction of the dart fold, as well as prevent excess stretching of the fabric.
If you've ironed the dart, pinning the fabric isn't usually necessary, but I find that it helps.

And now your dart is done!

This method is how I learned to do darts, and has served me well for many years! But over the holidays, I picked up a book on couture garment finishing, which has a lot of things that I've learned. One of them is a different way to thread the machine before sewing your darts, which eliminates the need to tie the threads. I have yet to give it a try, but that's my next mission, which I'll be sharing with you soon.
Happy sewing!
No comments:
Post a Comment