
That being said, the secret to any great project is proper preparation and fine finishing. This post is going to be all about the prep work.
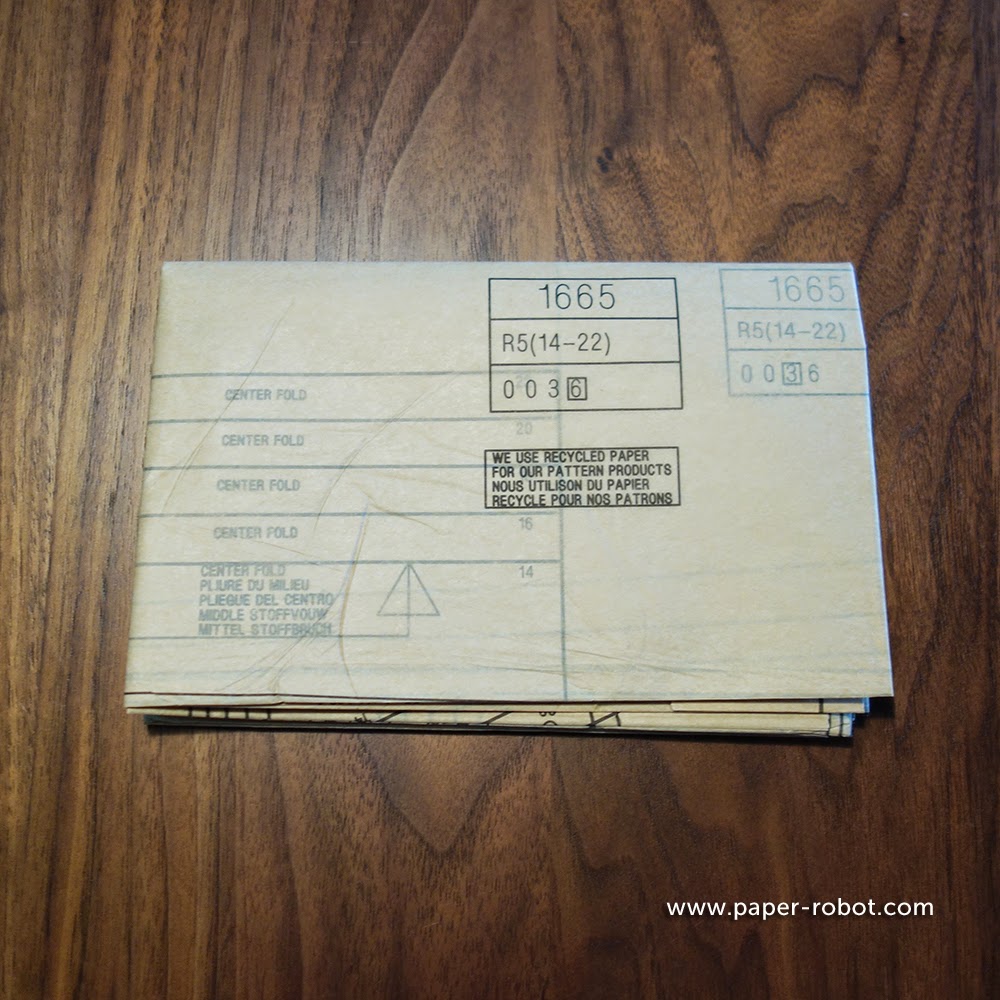 |
| Enjoy this nicely folded pattern while you can! It will look NOTHING like this when you're done. |
Step 1: Look at your pattern's instruction sheet.
The first page will look something like this if you've got a pattern from one of the large publishing houses. Other pattern instructions will have something similar, but laid out differently. This particular sheet is from New Look 6977.
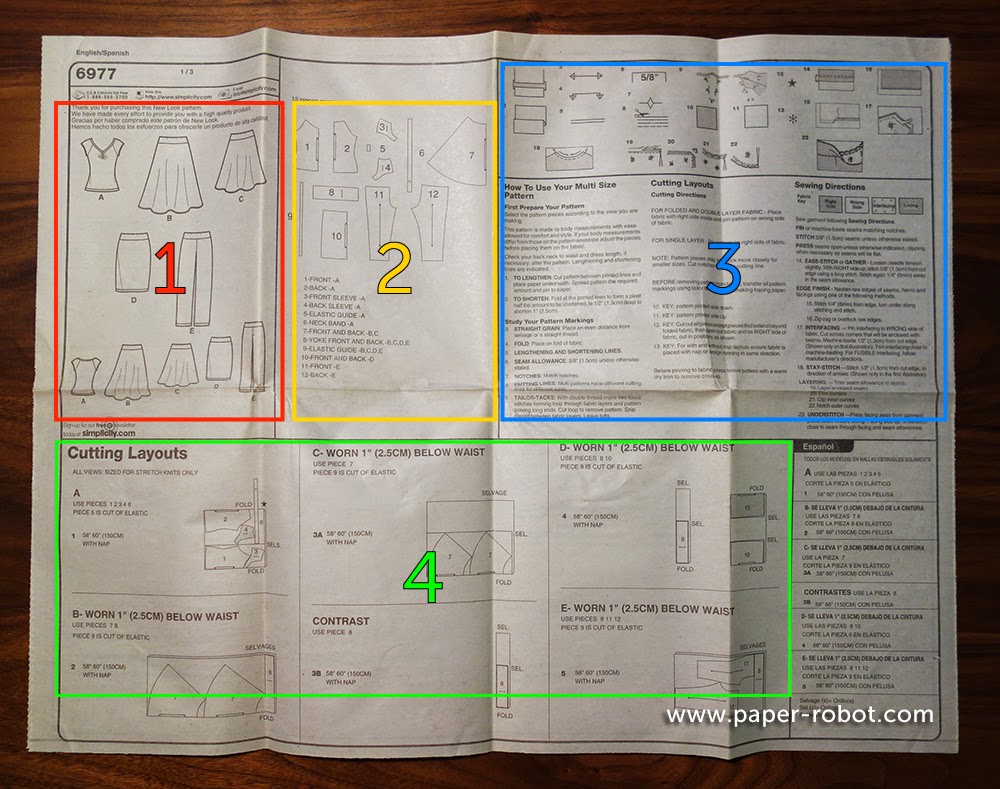
1. Garment Illustrations (top-left, in red)
Yes, these are on the front and back of the envelope, but it's good to have an extra reference, so you can remember which project you're working on.
2. Pattern Pieces (top-middle, in yellow)
This shows you the actual pieces that are in the envelope, and tells you which pieces you'll be working with. Here's a close-up of the garments and pieces for Simplicity 1665:
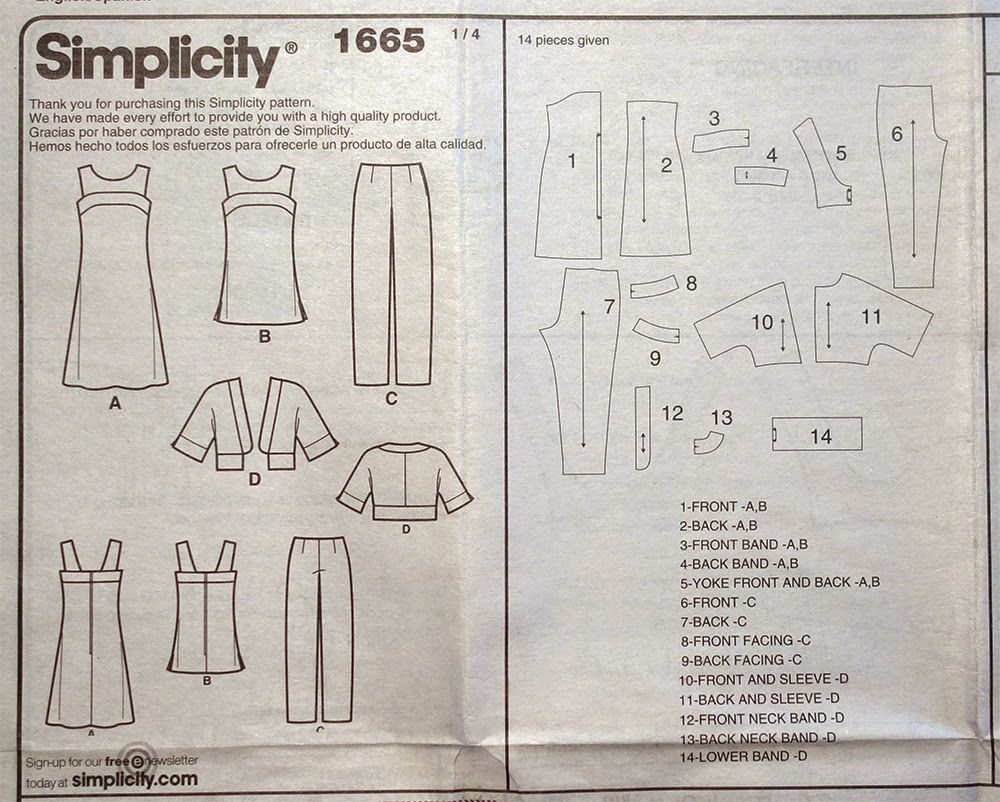
Since I'm making Dress A, I can see that I'll need pieces 1 through 5. I can see what the pieces look like, as well as some pertinent information, like if a piece is cut on a fold, or which direction the grainline should be.
3. General Instructions (top-right, in blue)
While they are useful to read, these instructions can be kind of cryptic, and are best used to jog your memory on what things mean, rather than as a teaching aide.

4. Cutting Layouts (bottom, in green)
This section provides project-specific suggestions on how to lay out your fabric. While I often find that I can move pattern pieces around to fit my fabric more economically, I always refer to this to start. The one for my Dress A shows me where to place each pattern piece relative to the fold and selvages, for different widths of fabrics.

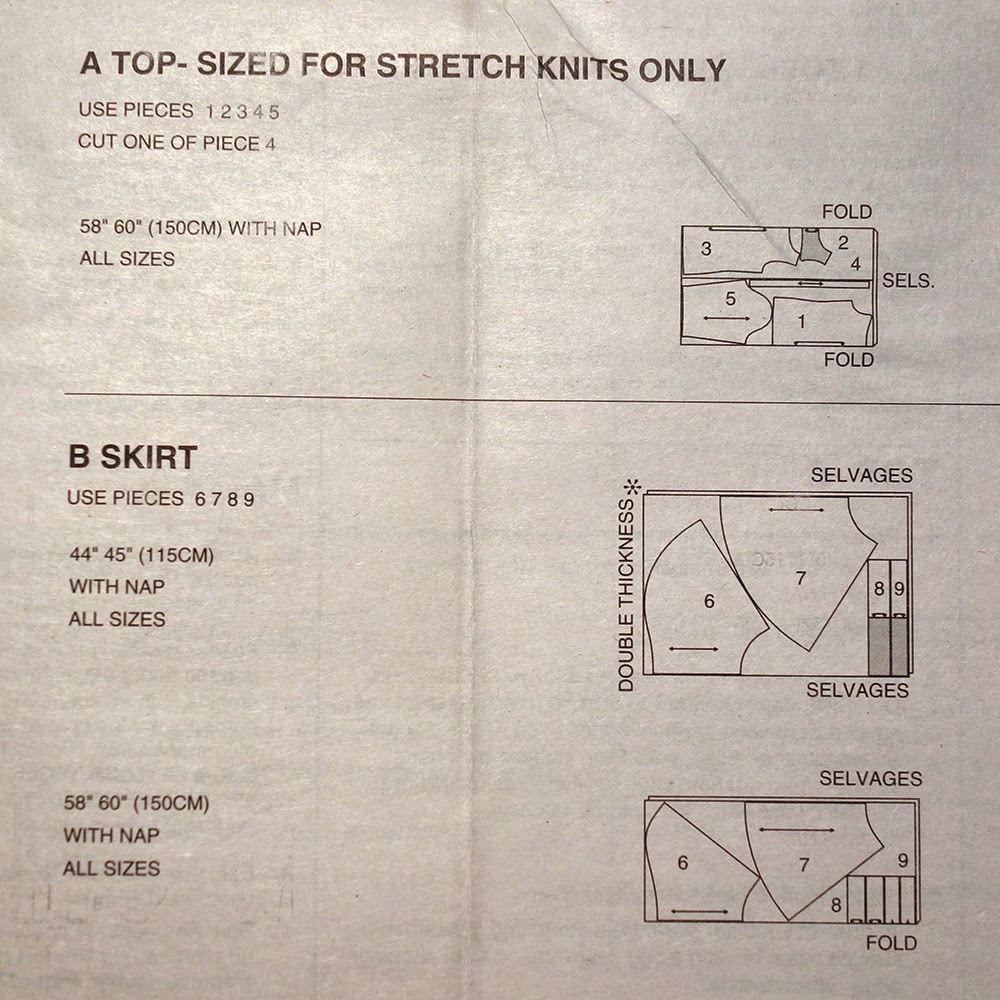
Sometimes your pieces may require special attention. In this photograph of a different pattern, Top A has you fold the fabric at the top and the bottom, while Skirt B has very large pieces, which may require the full width of the fabric.
Step 2: Trace Your Pattern (optional)
One of my favourite things for sewing is Swedish Tracing Paper, which can be obtained from Amazon or possibly your local fabric store. I have absolutely no idea if it really is Swedish, but I can tell you it is ~~~amazing!
If you choose to use it, you'll lay out your pattern pieces and trace them out with a ballpoint pen. Make sure you get every marking from the piece! If you're tracing a large piece, or just want to make sure that your papers don't shift, go ahead and pin them together.
This tracing paper is especially durable and flexible, which means you can sew it to test out your pattern sizing and fit before you cut out your actual fabric. While this takes extra time, it's faster than making a test garment out of muslin, and can save you from a disaster if you mess up with your more expensive fabric.
If you don't want to do this step, you can go straight to Step 3!
Step 3: Cut your pattern pieces
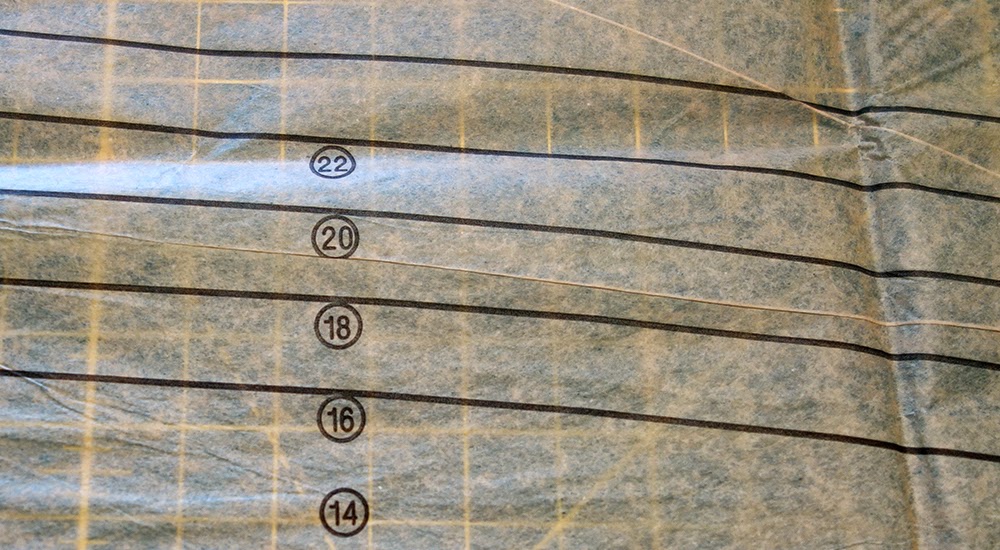
One of the first things you should notice about the pattern pieces is that they have all these different lines. Each line corresponds to a different size. Make sure you're cutting out or tracing the right line for your size!
Step 4: Check and Make Alterations
We all have different body shapes and sizes, so before you cut your fabric, it's good to make sure that your pattern is going to fit you. It's hard to tell for sure if you're just holding the pattern up to you. If you aren't sure, always cut a larger size than you think you need, because it's easier to cut down your fabric than try to make it grow.
Altering the pattern for height is usually included in the pattern. If you look, you should see some lines that indicate where to fold or extend for petite or tall sizes. Because I'm short (I'm only 5'1, but I'll have you know I'm taller than Janelle Monae!) I've folded up the pattern piece according to the instructions on it.
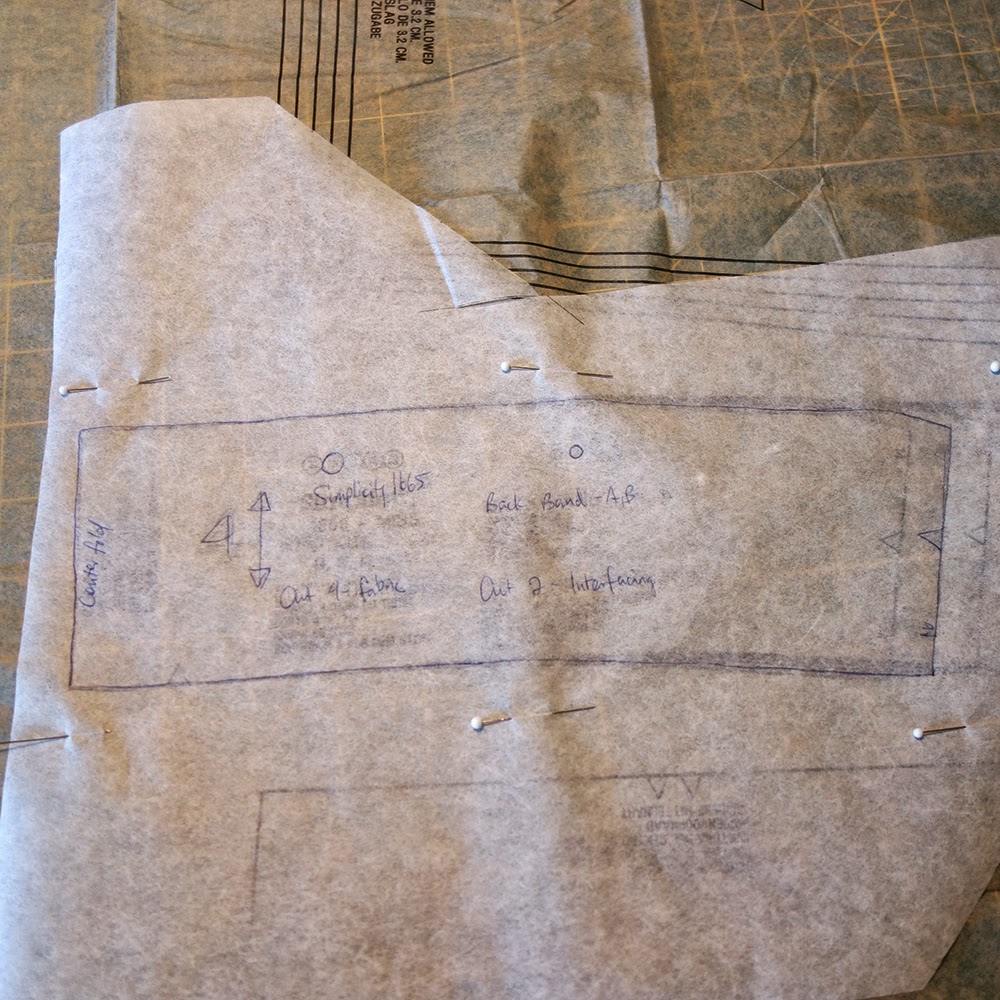
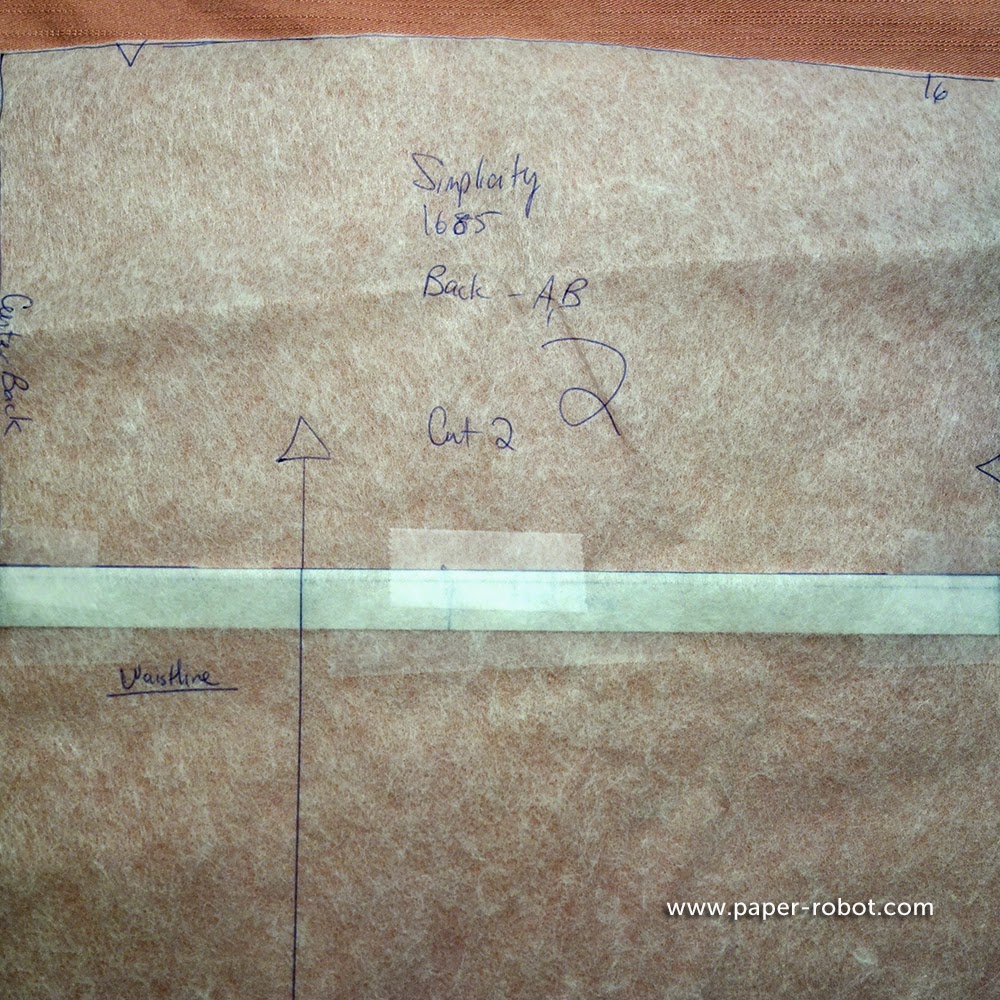
This is also where the tracing paper can come in very handy. Trace the outside of pattern pieces for ones that need to have two sides, or are cut on the fold. Tape together the second piece on a fold, and try sewing the pattern together. It doesn't take too long to sew a few pieces to try on for fit. You can make any alterations to your traced pattern piece, without damaging the pattern itself.
Step 5: Cut your fabric!
You're halfway through your sewing prep! Next week we'll look at cutting out fabric, transferring markings, and attaching interfacing.
After that comes the glamour of sewing!
From the normal straight stitch machine to the zigzag stitch machine or the industrial machine, we find that innovation has been the keyword of this brand. Best Sewing Machines
ReplyDeleteThey frequently have two or more works in progress (WIPs) and find it impossible to be monogamous to one project. garn fame
ReplyDeleteThis machine is practically for creative sewing and embroidering projects. best sewing machine
ReplyDeleteI just want to let you know that I just check out your site and I find it very interesting and informative.. best mini sewing machine
ReplyDeleteI discovered this is an educational and intriguing post so i suspect as much it is extremely helpful and proficient. I might want to thank you for the endeavors you have made in composing this article. Singer 4452 vs 4411
ReplyDeleteI just got to this amazing site not long ago. I was actually captured with the piece of resources you have got here. Big thumbs up for making such wonderful blog page! buste di carta
ReplyDelete따라서 쉽게 장점을 취하고 안전하게 지낼 수 있습니다. 토토사이트 그러나 Toto 인증 프로세스 덕분에 프로세스가.
ReplyDeletewhat is a center fold? do i need to do anything with it? i am a visual learner, it will be best if its explained thoroughly
ReplyDelete