I made this one out of red and white papers and stuck a bright blue square in the middle, to celebrate both Canada Day and Independence Day!
This is a super easy project, though it does require some time, depending on how large you want to make it. You can use any paper, really, even printer paper, but decorative scrapbook paper or cardstock is more durable.
Difficulty level: Easy
Time commitment: 1-2 hours
Materials:
- Paper (I used 6 sheets of 12"x12" cardstock)
- Ruler
- Scissors or paper punch
- Matching thread
You can use any shape or size of paper, but I would say that 1" is probably the minimum; any smaller and you risk the paper tearing too easily.
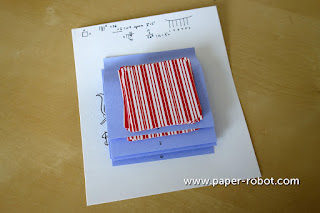
I actually wanted to do a circle garland, but didn't feel like stopping to get a circle punch, and ended up doing squares with rounded corners instead. I cut my paper into 2" squares to start, which gave me a total of 216 pieces. (217, actually since I added the blue one.)
Pro tip: if you buy a paper punch to do this project, get one with a larger handle, because as cute as this corner punch is, my thumb was seriously hurting after about 20 squares.
At first, I was going to round all of the corners, but decided to have a mixture of roundedness; this was partially decided by my burgeoning carpel tunnel issues and my current fixation on asymmetry.
Once you have several squares, try arranging them on a surface to see what sort of pattern looks nice to you.
Whenever you're ready, start sewing paper together into strands. Some simple math will help you figure out how many to include per string.
For example: at 2"x2", 18 squares gets me a strand which is about 3'. (18*2"=36")
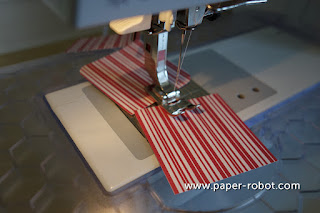
This will be a little bit longer, since there is a little bit of space between each square, and I placed them into the machine on an angle.
It helps to separate your squares into pre-counted piles, so that you don't need to stop and count as you sew.
For my garland, I had 13 strands, in this order (number of squares): 13, 16, 15, 18, 17, 20, 19, 20, 17, 18, 15, 16, 13.
Once you have your piles set up, you can start sewing the squares together, leaving long tails of thread at either end of your strands.
Here's a secret: despite being told that you should never operate the machine without fabric, you can actually do 1-2 stitches and it's totally OK. Which means that you can sew through your paper, and you don't need to be worried if your next square isn't directly adjacent.
This also means you can have a little bit of space between each square, which gives them some room to move around a bit. If you'd like a lot of space between each piece, lift the presser foot, and pull the threads out gently, then continue to sew.
If you make a mistake, or your thread breaks, or (as I did) you accidentally stitch more than 2 stitches and end up jamming your machine a little (oops), just use your hand wheel to align the paper with the previous holes, and keep going.
Once you have a couple of strands, you can use sticky notes to arrange them on your wall and see what ordering looks good. It's kind of like basting. I found that Post-Its Super Sticky line* is very effective at holding up strands.
*Amazon affiliate link; I receive 4% of your purchase Amazon credit if you click. Please support this blog!
Honestly, it stayed for a good couple of hours, so you could even stop here if you want. But attaching to yarn or string is much better.
I keep two pins stuck into this wall, and strung a piece of yarn from one end to the other. Working from the centre out, I tied the threads onto the yarn, with the Post-Its helping to carry the weight of the strands. A little bit of glue helped, too.
Pro-tip: tie the threads onto the yarn with a pin in the middle. As you carefully tighten the knot, you can move the pin to control the placement, such as right up against the yarn:
This is the most tedious part of this project. The actual sewing is quite minimal, but with enough strands, you can get a very striking backdrop! Another option would be to just staple the top paper to the yarn. Nobody will really notice, when you have so many, and it will be just as secure.
Trim the threads down, et voilà!


No comments:
Post a Comment